
Seed Anatomy
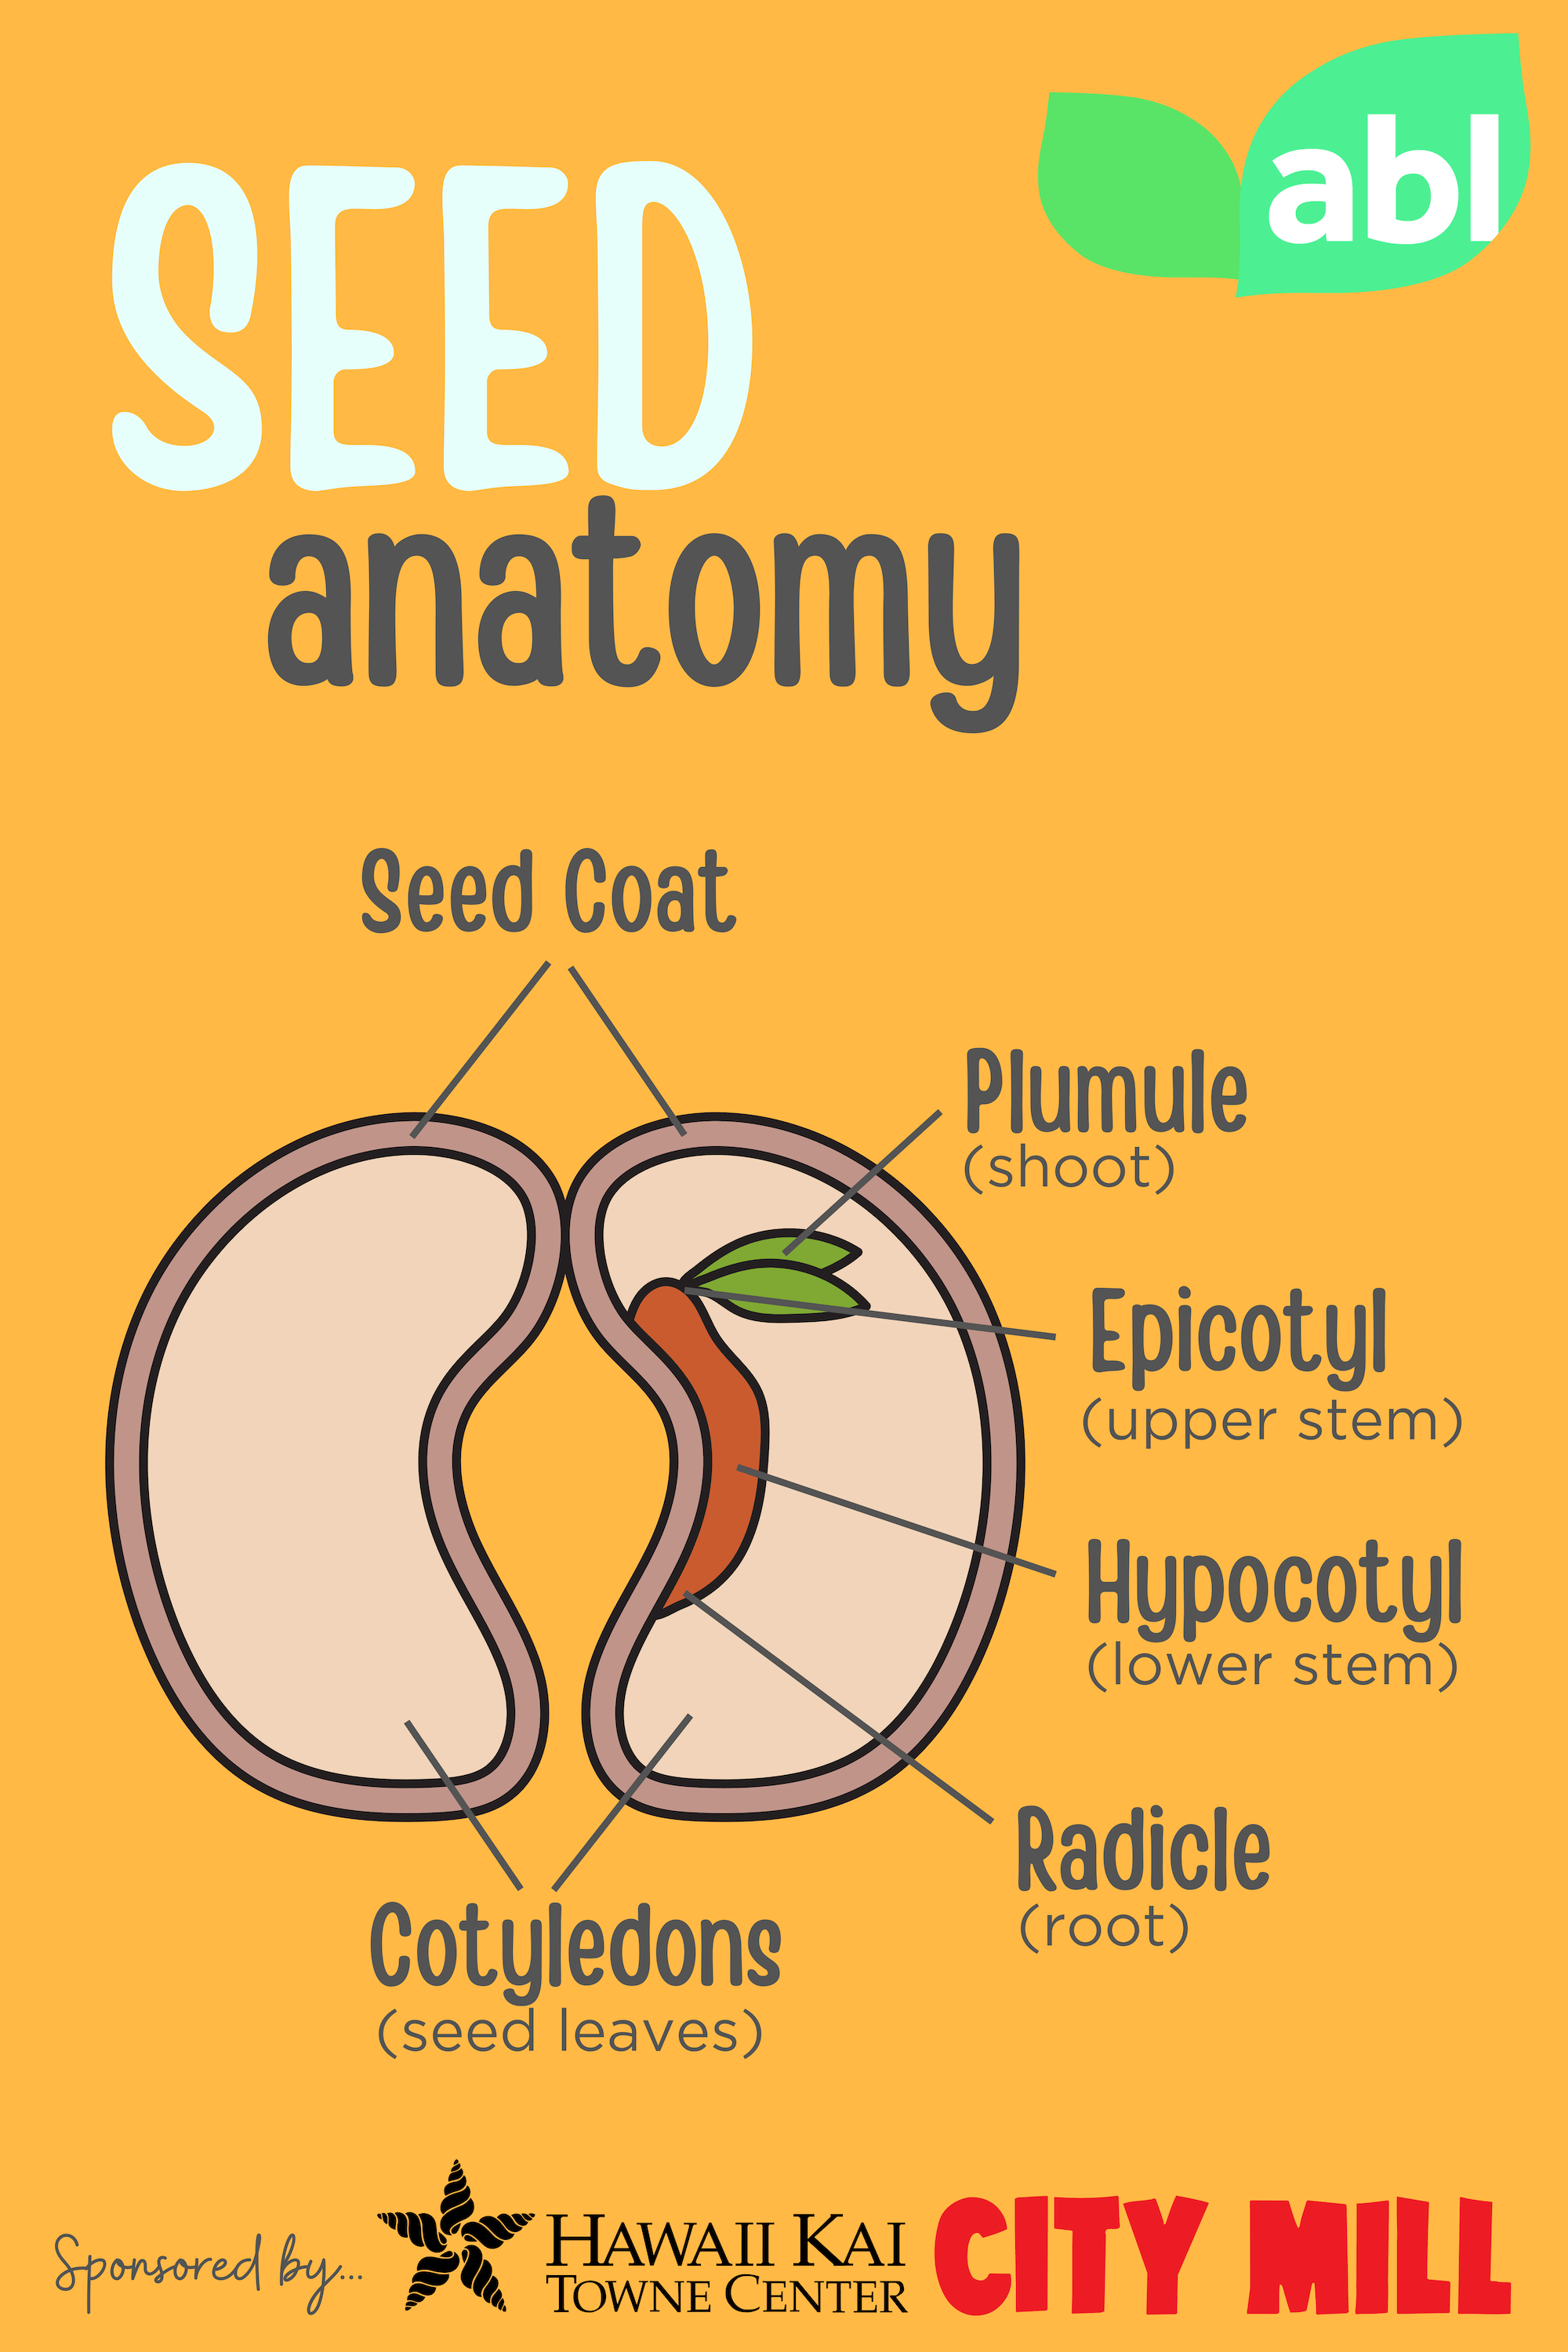
Seed Coat – Like a tiny jacket, it protects the baby plant inside until it’s ready to grow.
Plumule – The part that will become the plant’s first leaves and stem.
Radicle – The baby root that grows down into the soil to drink water.
Cotyledons – The seed’s lunchbox, full of food for the baby plant until it can make its own.
Epicotyl – The stem section above the cotyledons that will keep growing upward.
Hypocotyl – The stem section below the cotyledons that pushes the baby plant up out of the soil.
Seed Germination

Imbibition – The seed soaks up water like a sponge, waking up the baby plant inside.
Radicle – The baby root grows out first, anchoring the plant and drinking water from the soil.
Shoot – The little stem and leaves push upward toward the sunlight.
Seedling – The baby plant opens its first leaves and starts making its own food from sunlight.
Seed Germination Experiment
Items Needed – Paper towels, small jar, seeds (beans or peas recommended), water
Fill jar with scrunched paper towels.
Add water to completely wet paper towels. Pour out an excess water.
Carefully push seeds down into the paper towels around the edge of the jar so they can still be seen. Make sure they are firmly held in place.
Put your jar in a safe place and check in regularly to observe any changes. Add water as necessary to keep paper towels moist.
See Little Bins for Little Hands for full instructions.
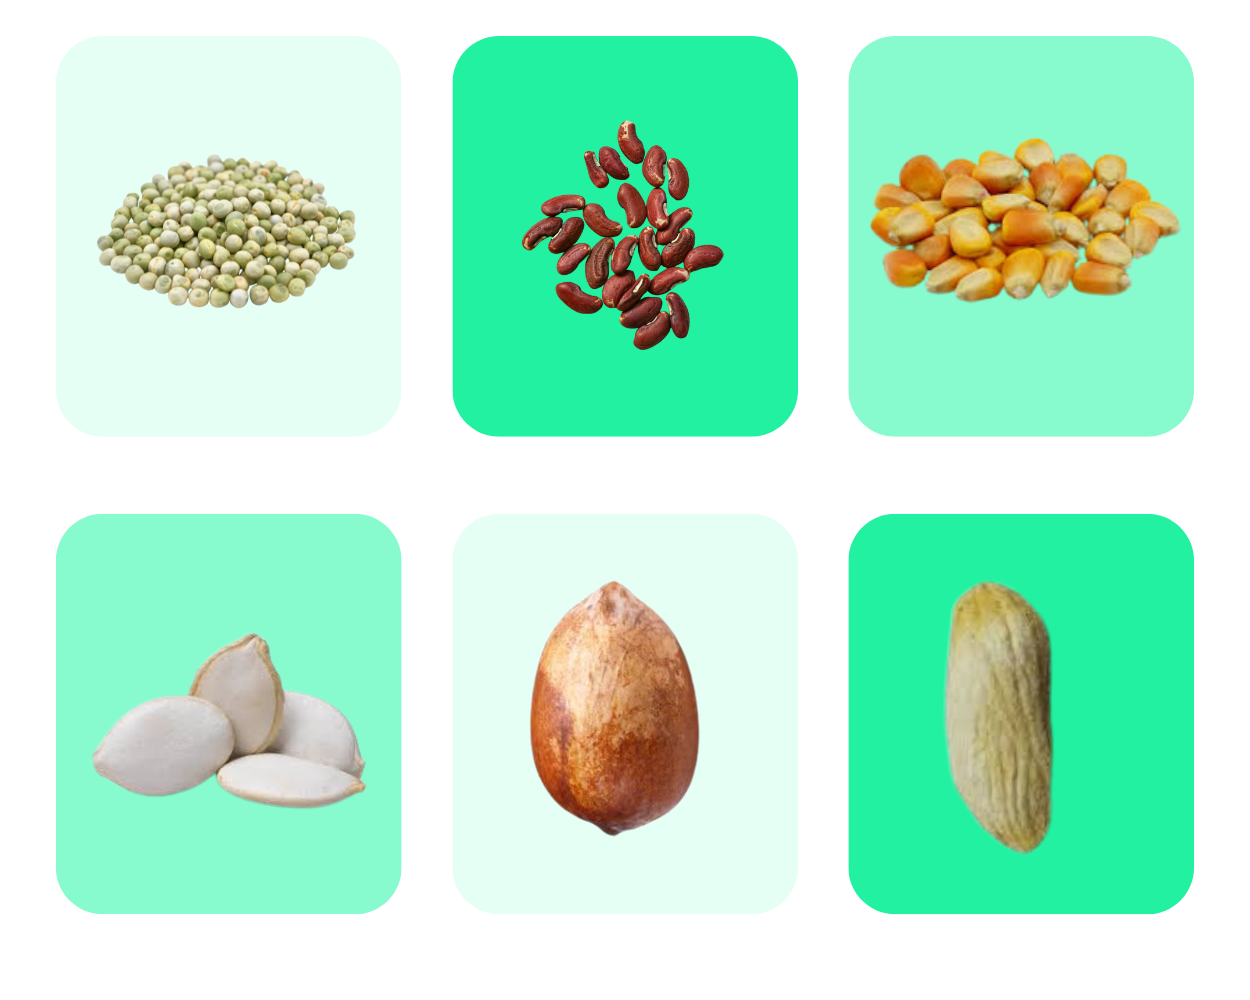
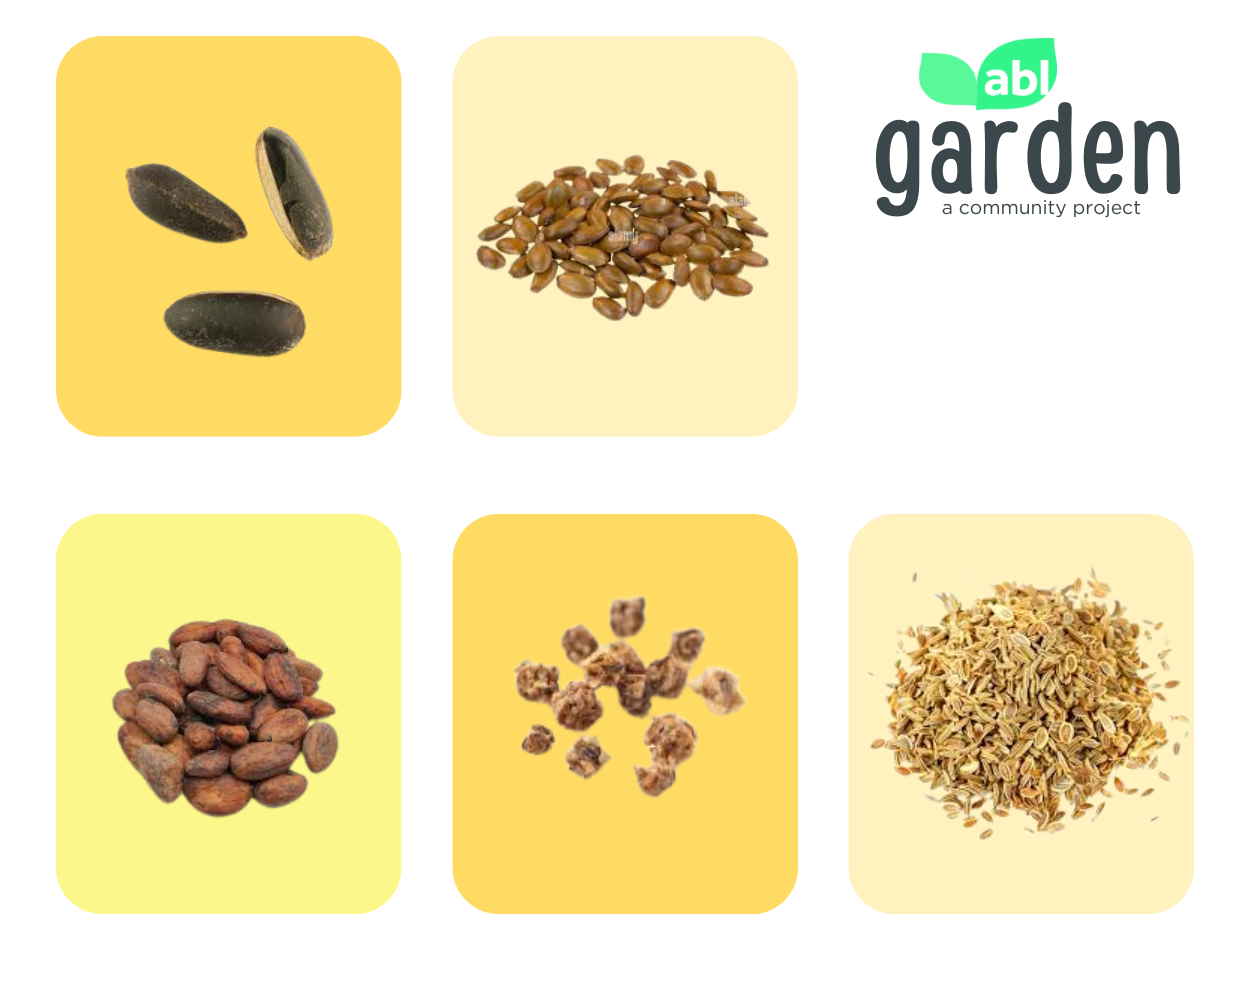
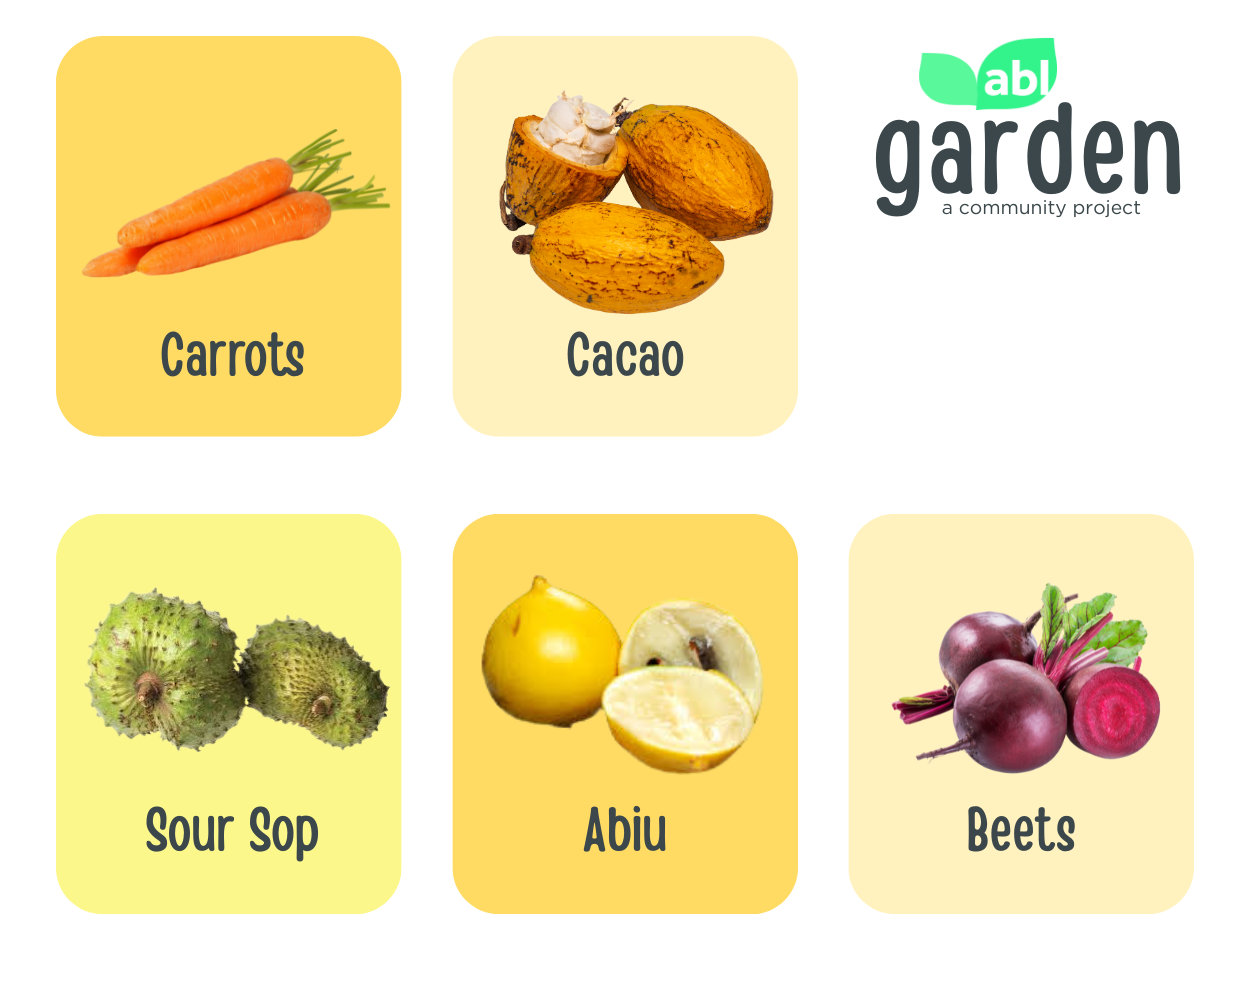
Seed Match Game
How many seeds can you match to the vegetable or fruit? See how many you got right using the answer key below.
Level 1

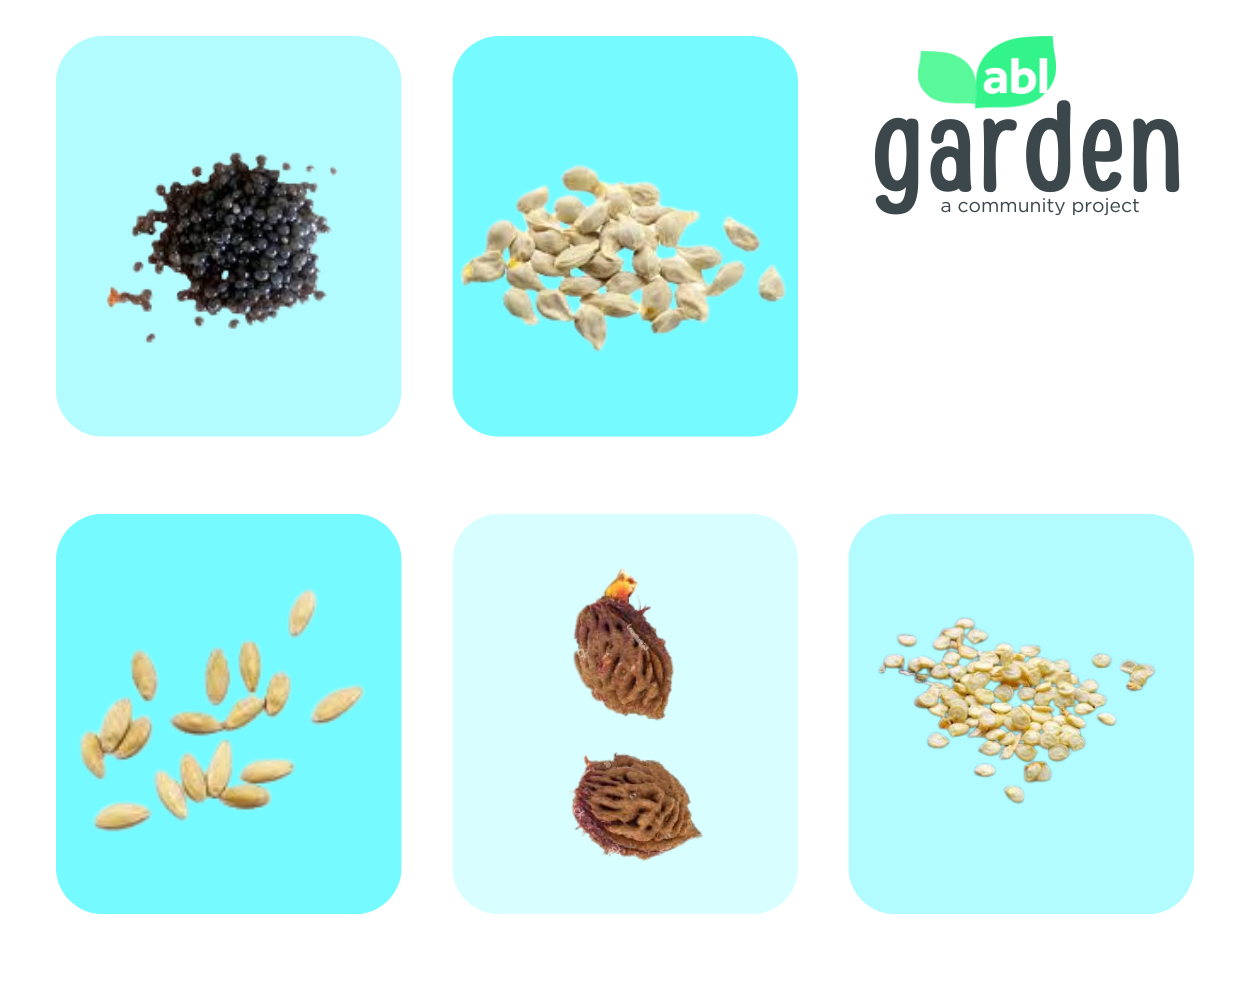
Level 2
Level 3
-
Level 1
Top Row - Peas, Beans, Corn
Bottom Row - Pumpkin, Avocado, Mango
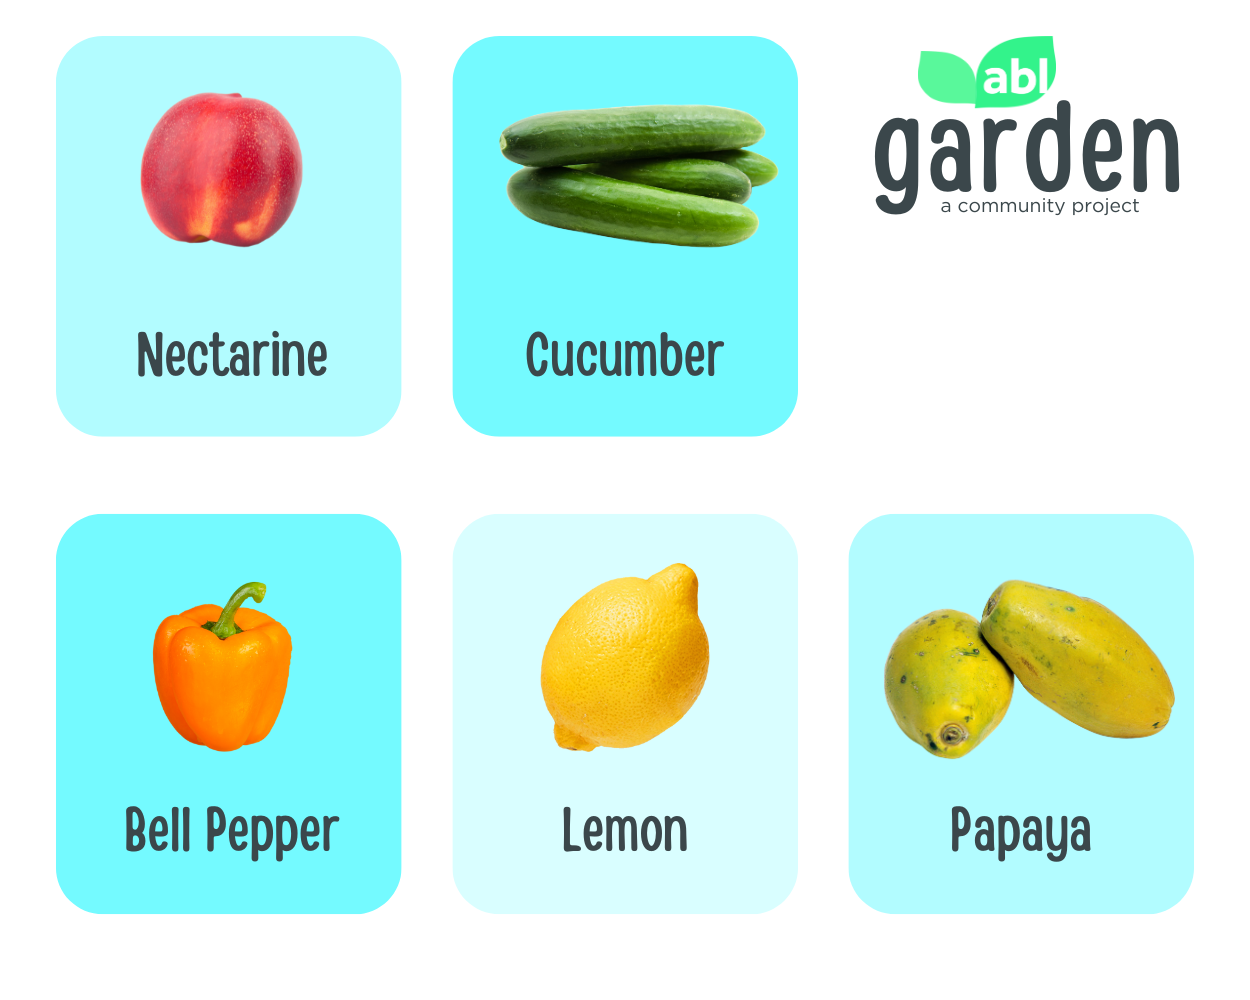
Level 2
Top Row - Papaya, Lemon
Bottom Row - Cucumber, Nectarine, Bell Pepper
Level 3
Top Row - Abiu, Soursop
Bottom Row - Cacao, Beets, Carrots
Bottom Row - Cucumber, Apricot,
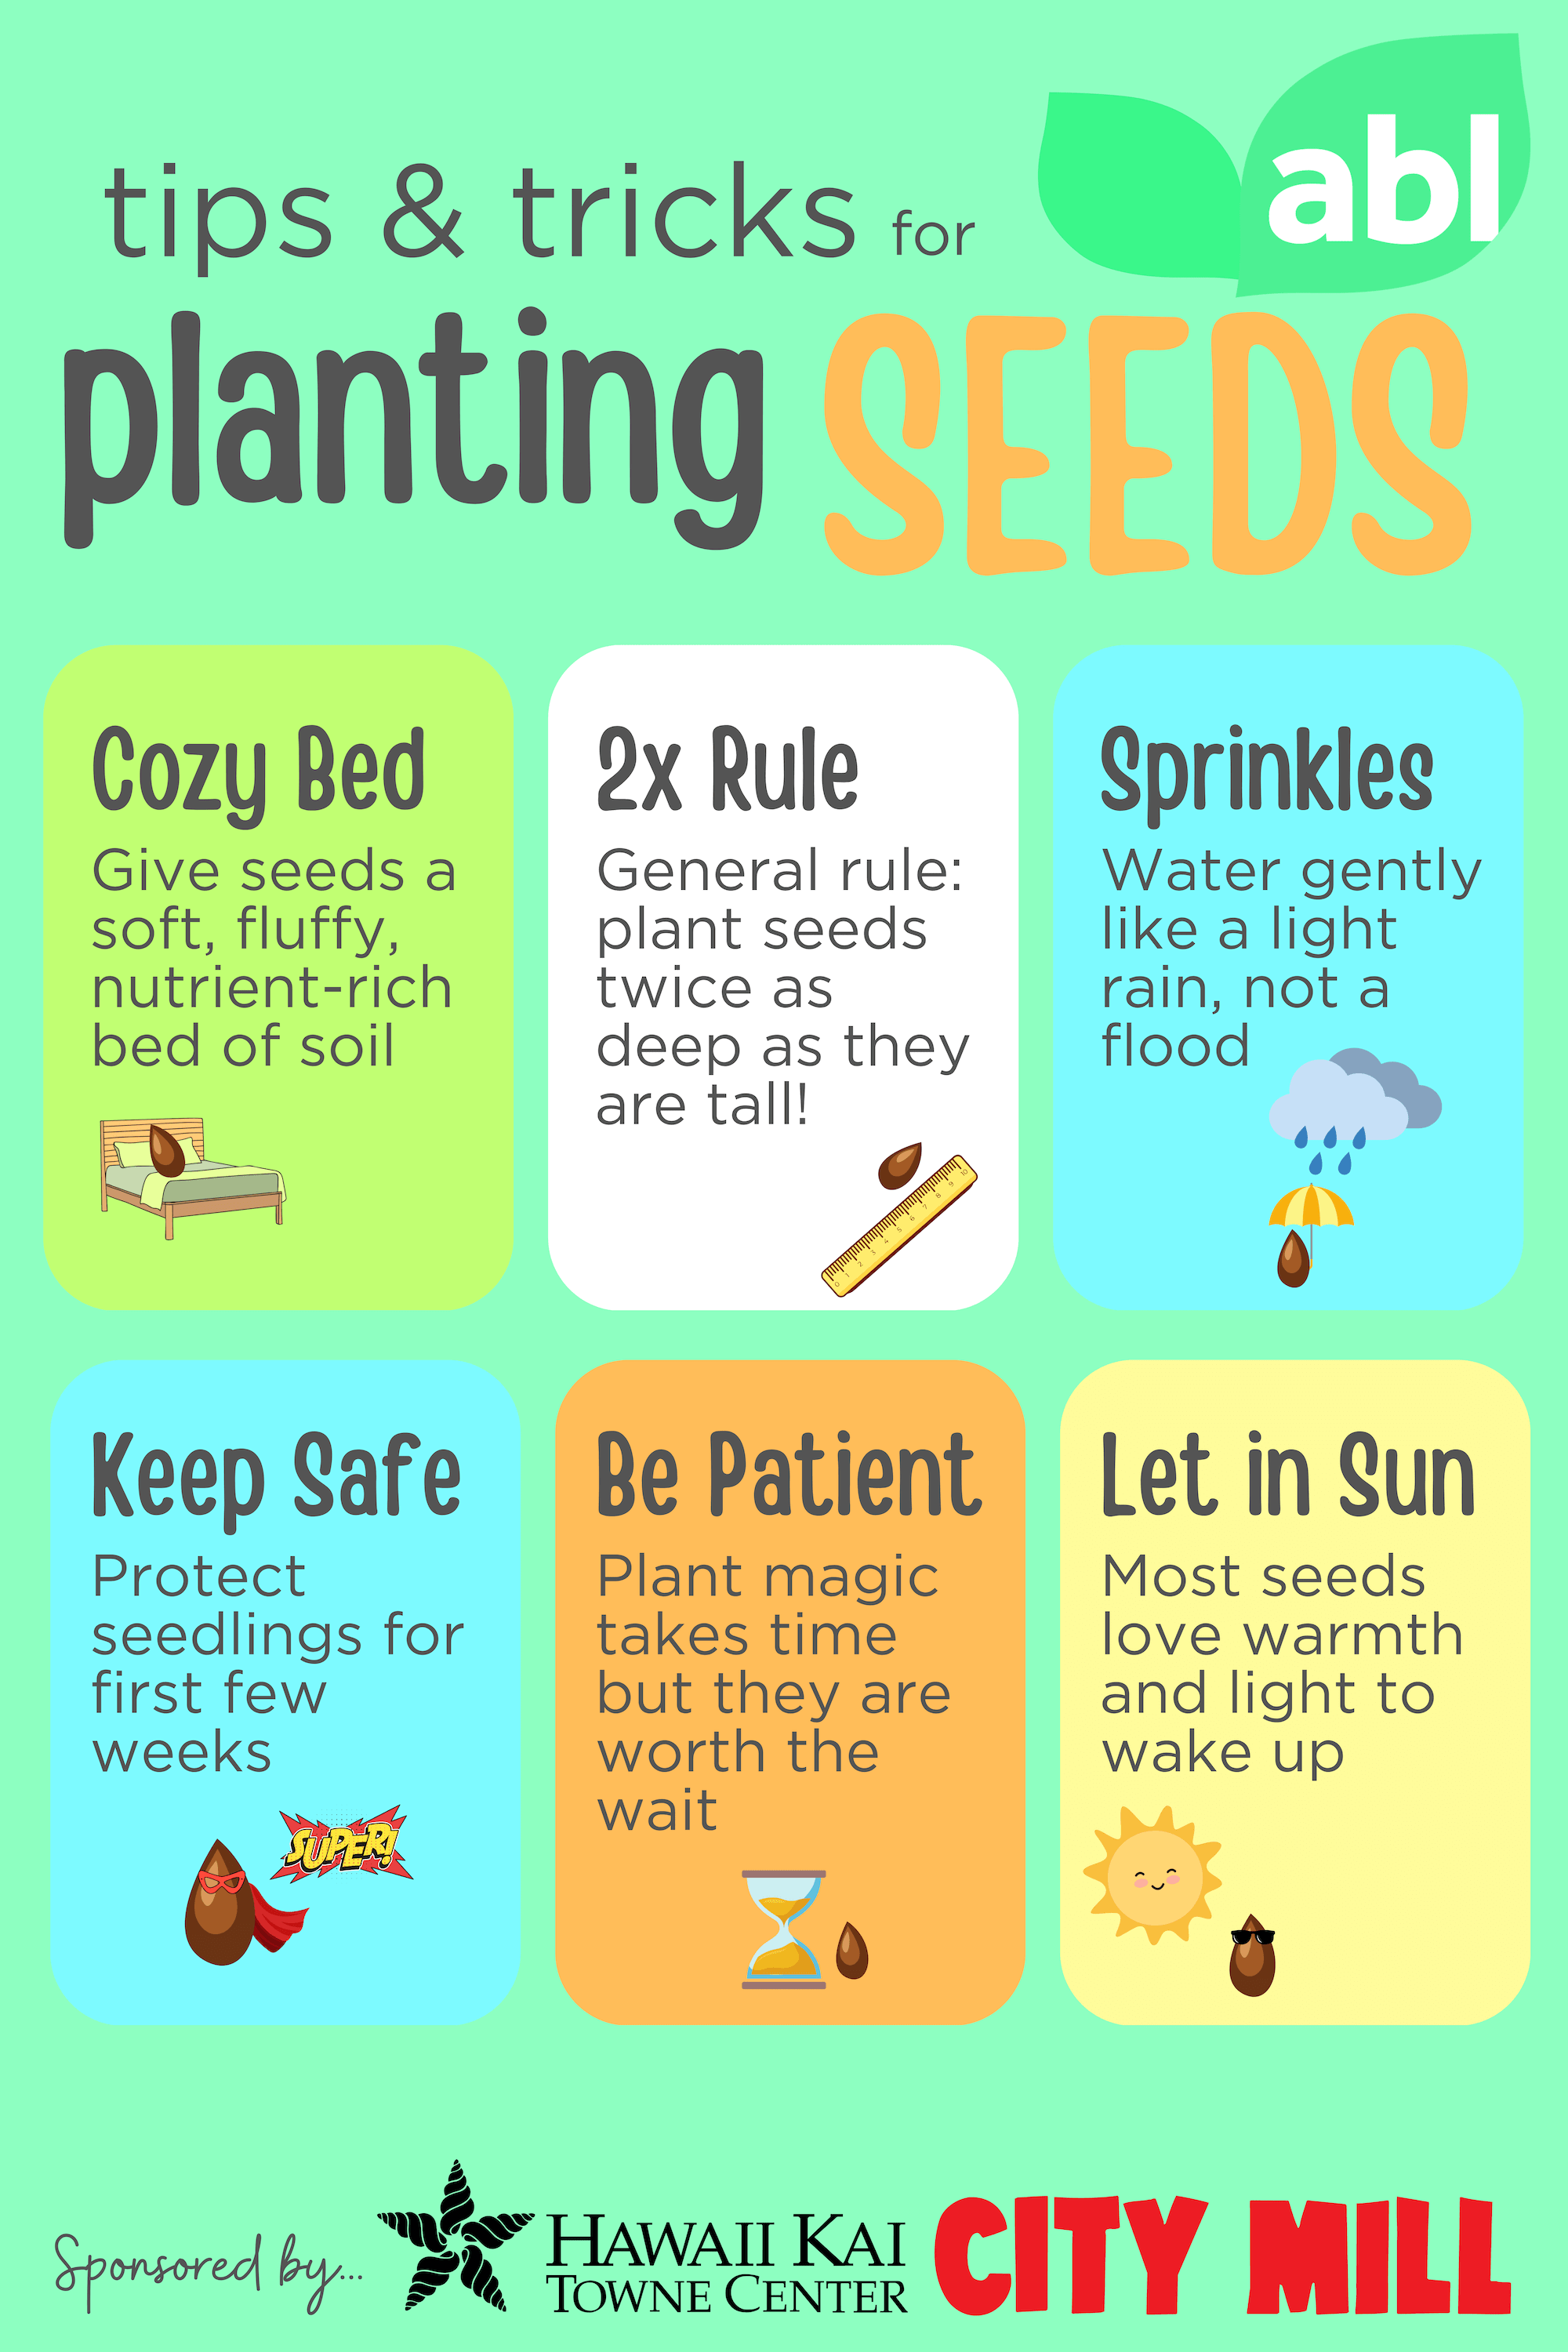
Planting Seeds
Saving Seeds
-
1Select overripe fruit (seeds in immature fruit are also immature and will not germinate).
Cut the fruit in half and squeeze the seeds into a jar. The gelatinous coating on the seed is what prevents seed germination and must be removed.
Add an equal amount of water to the amount of seeds and juice. The viable seeds will fall to the bottom of the jar. Remove the suspended material.
Let the jar sit for 3 days at room temperature to ferment.
Remove the debris on the surface of the fermented liquid and stir.
Let the jar stand.
Pour the remaining solution slowly through a strainer to catch the viable seeds.
Wash the seeds in the strainer and shake excess water out.
Put the seeds in a plate to dry, occasionally stirring the seeds around to ensure even drying. Keep out of windy areas. Dry seed will be light and has a tendency to blow away.
When the seeds are dry, place them in an envelope and store them in a cool dry place in a capped jar, preferably in a refrigerator.
From Kohala Center guide.
-
Certain types of plants use the dry seed saving method including coriander, lettuce, okra, etc.
Let plant grow until seeds form.
Leave plant to grow until seeds begin to dry out.
Harvest dried seeds.
Store seeds in a jar or envelop and store them in a cool dry place.
